Team management: collaborate in queen breeding company
Welcome to team management in QueenBees. If you’re running a larger operation, working with family members, or employing staff to help with your queen breeding business, this feature lets you collaborate efficiently while maintaining control over who can access and modify different parts of your data.
Info
Subscription required: Team management is available in Professional (up to 5 members) and Enterprise (unlimited members) plans.
Understanding team collaboration
In QueenBees, team management allows you to:
- Add team members with different access levels
- Assign specific roles that define what each person can do
- Send invitations so members can access the system with their own accounts
- Track activity and see who’s joined your team
- Maintain security by controlling permissions for sensitive operations
This is perfect for operations where:
- Multiple people handle different aspects of breeding (grafting, mating, order fulfillment)
- You have office staff managing orders while breeders work in the field
- Family members share responsibilities
- You want to separate breeding work from administrative tasks
Before you start
To manage team members, you need:
- Owner or Administrator role in your apiary
- Active subscription:
- Professional plan: up to 5 team members
- Enterprise plan: unlimited team members
Roles & permissions explained
QueenBees has five distinct roles, each designed for different responsibilities in a queen breeding operation.
Owner
Who: The account creator, typically the business owner.
Full control: Can do everything in the system, including:
- All breeding operations (locations, hives, queens, batches, series)
- Order management and fulfillment
- Financial operations (invoices, payments, union reports)
- Team management (add/remove members, change roles)
- System settings and integrations
- Access to all reports and analytics
Cannot be changed: The owner role is permanent and cannot be transferred or removed.
Visual indicator: Owners are marked with a crown icon 👑 in the team list.
Administrator
Who: Trusted managers or partners who need nearly full access.
Capabilities: Almost identical to Owner, including:
- Complete breeding operations management
- Full order and client management
- Team member management (add, edit, remove members)
- Financial operations and reporting
- System configuration
Limitations: Cannot change the owner’s role or remove the owner.
Use case: Co-owners, business partners, or head managers who need full operational control.
Breeder
Who: People focused on queen breeding work - grafting, breeding registry, mating.
Capabilities:
- Breeding operations: Full access to hives, locations, series, batches, and queens
- Queen orders: View and manage queen orders within batches
- Breeding registry: Add and update breeding queens, download files
- Queen lines: View and update queen line information
- Shipments: View and manage shipments to prepare queens for delivery
- Work & todos: Track and manage breeding tasks
- Origin certificates: Create and manage certificates for shipped queens
- Postal integration: Create and manage parcels for shipping
Limitations:
- Cannot manage orders or clients
- Cannot access financial information (invoices, payments)
- Cannot manage team members
- Cannot modify system settings
- Cannot manage union reports
Use case: Professional queen breeders, grafting specialists, or breeding managers who focus on production.
Technician
Who: Field workers, assistants, or part-time staff who help with day-to-day tasks.
Capabilities:
- Hives: View, create, and update hives
- Locations: View locations
- Series & batches: View batches, update series, add queens from batches
- Queens: Update queen information
- Shipments: View and manage shipments
- Queen lines: View queen lines
- Work & todos: View and manage tasks
- Breeding queens: View breeding registry
- Change counts: Update series counts
Limitations:
- Cannot create or delete major records (batches, series, queen lines)
- No access to orders, clients, or financial data
- Cannot manage team members or settings
- Cannot manage union reports or invoicing
Use case: Field assistants, seasonal workers, or employees who help with specific tasks under supervision.
Logistic
Who: Office staff, order managers, or people handling customer service and shipping.
Capabilities:
- Orders: Create, view, and update orders (but not full management)
- Clients: Full client management (view, create, update, search)
- Shipments: Full shipment management
- Order settings: Manage clubs and order configurations
- Invoices: Full invoice management
- Origin certificates: View certificates
- Postal integration: Full parcel management
- Queen lines: View queen lines (for order processing)
Limitations:
- Cannot access breeding operations (hives, series, batches, queens)
- Cannot manage team members or system settings
- Cannot create or manage union reports
- Cannot access breeding registry
Use case: Office administrators, customer service staff, or logistics coordinators focused on order fulfillment.
Accessing team management
- Navigate to Settings from the main menu
- Select “Team” from the settings sidebar
- You’ll see the team management page with all current members
If you don’t see the Team option:
- You may not have the required permissions (need Owner or Admin role)
- Your subscription may not include team features (upgrade to Professional or Enterprise)
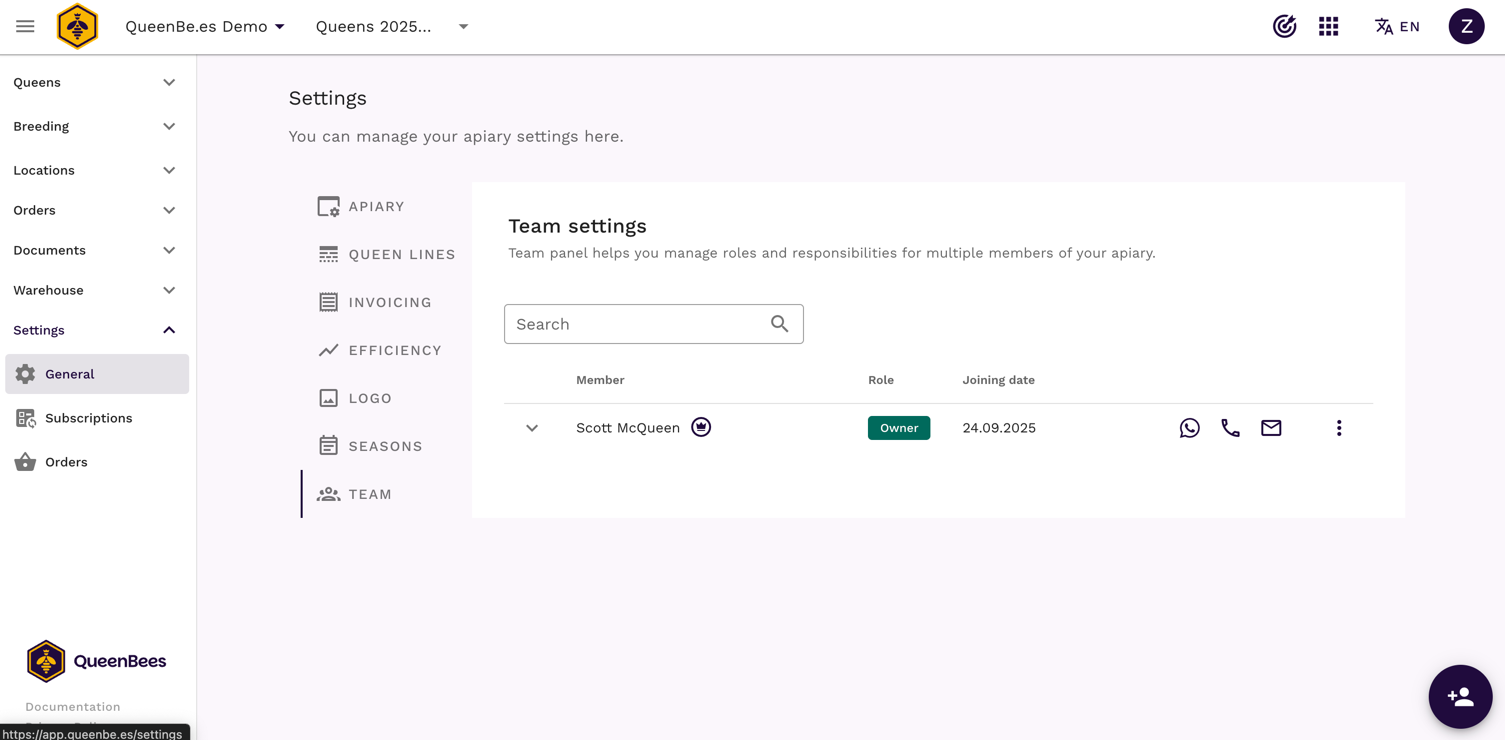
Viewing your team
The team list shows all members with key information:
What you’ll see
- Member name: Display name of the team member
- Role: Their assigned role with a color-coded label
- Joined date: When they joined the team
- Contact icons: Quick access to WhatsApp, phone, or email
- Invitation status: Icon showing if invitation was sent, accepted, or rejected
- Owner indicator: Crown icon for the account owner
Adding a new team member
When you add someone to your team, you’re creating their profile in the system. They won’t have access until you send them an invitation.
Step-by-step process
- Click the “+” button at the bottom right of the team page
- Fill in member details:
- First name (required)
- Last name (required)
- Email (required for sending invitations)
- Phone (optional, but recommended for field contact)
- Select a role from the dropdown:
- Administrator
- Breeder
- Technician
- Logistic
- Invitation option:
- “Send invitation after adding” is checked by default
- Uncheck if you want to add the member but send the invitation later
- Provide consent (required for new members)
- Confirm you have the person’s consent to add them to the system
- Review the privacy policy link
- Click “Add” to save the new member
What happens next
- If “Send invitation” was checked: The system immediately sends an invitation email
- Member receives: Email with a link to join the team and create their account
- You see: The member appears in your team list with invitation status
- They can: accept the invitation at queenbe.es app and start the work in given role
Editing team members
You can update member information anytime to keep your team data current.
What you can edit:
- Name: First and last name
- Email: Contact email address
- Role: Change their assigned role (if you have permission)
- Phone: Phone number for direct contact
Removing team members
Sometimes you need to remove someone from your team.
Warning
Important: Removing a team member is permanent. They will immediately lose access to the system. Consider carefully before removing someone, especially if they’ve been working with data.
Who can remove members
- Owners: Can remove anyone except themselves
- Administrators: Can remove Breeders, Technicians, and Logistic members
- Others: Cannot remove team members
How to remove a member
- Find the member in the team list
- Click the three dots menu
- Select “Delete”
- Confirm the removal in the dialog
The member is immediately removed and loses system access.
Need help?
If you have questions about team management or need assistance with setup, our team is here to help.
- Contact our support team for setup assistance.
- Visit our contact page for a personalized consultation.
- WhatsApp support for quick queries or feature requests.